Archery
Archery
Cranked to Eleven
Bullshit
Bullshit
To Its Core
It all comes down to projectiles.
Bullet Bow has a total of 11 Photon Arts with the following names. This section will tell you how Bow Braver deals against enemies, along with deeper details for each of them. Courtesy to Synthsy and his team for the translation.
| JP Names | EN Fan Translation | EN Official Name |
|---|---|---|
| マスターシュート | Master Shot | |
| ペネトレイトアロウ | Penetrating Arrow | Piercing Arrow |
| トレンシャルアロウ | Torrential Arrow | |
| グラヴィティポイント | Gravity Point | Gravitic Vortex |
| カミカゼアロウ | Kamikaze Arrow | |
| シャープボマー | Sharp Bomb | Strike Bomber |
| ラストネメシス | Final Nemesis | |
| トリットシューター | Tritt Shooter | Kickshot Combo |
| バニッシュアロウ | Banishing Arrow | |
| ミリオンストーム | Million Storm | |
| チェイスアロウ | Chase Arrow | Chaser Arrow |
The maximum level of Photon Arts is 17, having higher power while consuming less PP for some. Higher levels of enemies drop higher level disks, and every max-level Photon Arts can be obtained through Excube Shop Exchange, if it’s available on your server. Otherwise, get them from enemies drop and player stores.
Besides, it is possible to customize your Photon Arts into “Type-Zero (T0)” or “Zero” through the
terminal inside My Room [Personal Quarter], altering the behavior and modifying the stats.
There are two bullet bow Photon Arts that you can customize, which are Sharp Bomb
[Strike Bomber] and Trit Shooter
[Kickshot Combo].
|
|
|
|---|---|
| Mobbing | Bossing |
|
|
For
 Trit Shooter T0,
 Million Storm, and
![]() Kamikaze Arrow,
they do have their uses, but you will rely on the 6-8 PAs above due to its practicality. We also use a Katana PA too, but solely for moving around in quests.
Kamikaze Arrow,
they do have their uses, but you will rely on the 6-8 PAs above due to its practicality. We also use a Katana PA too, but solely for moving around in quests.
|
|
|
Here are the explanations for all PAs: properties, explanation, and even how to use them. While you are at it, a YouTuber named Blac to Basics has made a short video explaining bow Photon Arts. Check it out! Most of the things there are correct though. The faults are probably on my side because of JP language defiency and being careless during the editing.
Also, compared to the Google Doc version (whether you have seen it or not), Frame Data section has been merged into each individual PA, so the list below are the things you should know before proceeding.
|
Fire an arrow that can be detonated by further attacks. Charge to increase blast size. |
|
| Used as combination and multi-targeting PA. |
| Frames | Defaults | ||
|---|---|---|---|
| Normal | Charged | Power | PP Cost |
| 30 F | 36 (29) + 19 F | 100 | 50 (45) |
| Damage Property* | |||||
|---|---|---|---|---|---|
| Actual Power [Behavior + %] |
Damage Per Second [(Actual Power/Frames) x 60] |
Damage Per PP [Actual Power/PP Cost] |
|||
| Normal | Charged | Normal | Charged | Normal | Charged |
| 100 (Explode for 50% [65% w/ JA] of the damage accumulated over 3 seconds) | Deals no damage on impact. DPS and DPP vary based on what PAs goes into it. |
||||
This is the most important Photon Arts for Bow Braver, especially against bosses. You damage output sways heavily by this PA alone.
Firing a spherical marker and taking a short moment to arm, Banishing Arrow stays on the enemy for 10 seconds,
and only one can persist at any given time. If the enemy with it takes any damage that you do,
it will start the three-seconds detonation timer, accumulating the damage from the follow-up attacks.
The explosion occurs afterward, dealing 50% of the accumulated damage, or 65% if you fired it with Just Attack.
There are two important things to remember about Banishing Arrow. The first thing is that the following attacks can trigger the Photon Arts: bow Normal Attacks, other bow Photon Arts, offensive Techniques, Braver’s Snatch Step, MAG’s offensive Photon Blast, and MAG’s Technique-based auto-attack action. The second, only Just Attack Bonus and enemy’s Site Multiplier affect the explosion damage of Banishing Arrow.
Adding to the bullshit above, charging the PA increases the projectile speed and explosion radius. Movement key input causes you to slide after firing it as well while giving i-frames.
How would you use it?
|
Fire an arrow with penetrating properties. Charge to increase power and its size. |
|
| Used as damage and utility PA. |
| Frames | Defaults | ||
|---|---|---|---|
| Normal | Charged | Power | PP Cost |
| 20 F | 36 (29) + 19 F | 733 | 30 (25) |
| Damage Property* | |||||
|---|---|---|---|---|---|
| Actual Power [Behavior + %] |
Damage Per Second [(Actual Power/Frames) x 60] |
Damage Per PP [Actual Power/PP Cost] |
|||
| Normal | Charged | Normal | Charged | Normal | Charged |
| 535 [73%] | 733 [100%] | 1615 | 800 (916) | 17.8 (21.4) | 24.4 (29.3) |
Penetrate Arrow is one of the two main damaging Photon Arts for Bow Braver.
As the name suggests, the Photon Arts can go through enemies and it can hit them at least twice.
The distance between you and the targeted location often determines whether it can hit at least twice or not.
By average, staying 2.5 Step Distance (~8.75 in-game meters) from your enemies will guarantee it.
Humanoid enemies can be hit twice with Penetrate Arrow as well but at lower consistency. Addding to that, parts
of a larger enemy - be it by the size, length, or even surface area - can score multiple hits for Penetrate Arrow
Such examples are the arms of Dark Falz Elder, Profound Darkness, Gomorrath's arms, Bal Rodos, and Apos Dorios' belly when downed.
Keep in mind that “hitting twice doesn’t always double your damage” depending on your firing angle
and appearance of enemies, which can result in different hit judgement of the PA.
Charging also increases the size of the arrow, letting it hit enemies in a wider area,
but can interfere with the multi-hit property. Movement key input causes you to slide after
firing it as well while giving i-frames. Note that Penetrate Arrow does not have damage attenuation.
How would you use it?
 Fire several arrows at once. Charge to increase the number of arrows and its speed. |
|
| Used as damage and utility PA. |
| Frames | Defaults | ||
|---|---|---|---|
| Normal | Charged | Power | PP Cost |
| 20 F | 60 (48) + 19 F | 1424 | 25 (20) |
| Damage Property* | |||||
|---|---|---|---|---|---|
| Actual Power [Behavior + %] |
Damage Per Second [(Actual Power/Frames) x 60] |
Damage Per PP [Actual Power/PP Cost] |
|||
| Normal | Charged | Normal | Charged | Normal | Charged |
| 684 [3 hits x 16%] |
1424 [5 hits x 20%] |
2052 | 1082 (1275) | 27.4 (34.2) | 57 (71.2) |
Master Shot is the second main damaging Photon Arts for Bow Braver.
By default, Master Shot fires three arrows, but charging further increases the damage and the
arrow count to five. Additionally, charged Master Shot travels faster. Regardless of the mode you use,
Master Shot has a target seeking property and will move toward it as long as the target
is in your reticle, or you are locking-on to it.
Be aware that Master Shot can miss the target if it moves erratically. Movement key input causes you to slide after firing it as well while giving i-frames. Note that Master Shot has damage attenuation.
How would you use it?
 Fire explosive arrow from mid-air. Charge to increase power and blast size. Control flip direction with Forward/Backward keys. |
|
| Used as dodging and damaging PA. |
| Frames | Defaults | ||
|---|---|---|---|
| Normal | Charged | Power | PP Cost |
| 69 F | 60 (48) + 66 F | At most 2213 | At least 30 (25) |
| Damage Property* | |||||
|---|---|---|---|---|---|
| Actual Power [Behavior + %] |
Damage Per Second [(Actual Power/Frames) x 60] |
Damage Per PP [Actual Power/PP Cost] |
|||
| Normal | Charged | Normal | Charged | Normal | Charged |
| 1107 [50%] | 2213 [100%] | 962 | 1054 (1165) | 31.6 (36.9) | 63.2 (73.8) |
This is the “crafted version” of the normal Sharp Bomb, adding a charging mechanic,
increased explosion radius, higher explosion damage, allow movement input,
and providing invincibility frames during its air-hanging animation.
The explosive payload will often follow the locked-on target or your aiming reticle despite your movement input. Be careful that you are vulnerable and locked in the animation for a moment after firing it. Additionally, the explosion from Sharp Bomb Type-Zero lingers for around one seconds, damaging any enemy that accidentally goes by.
Note that Sharp Bomb Type Zero does not have damage attenuation.
How would you use it?
|
Stock up to 3 backup arrows; react to other PAs and charged Techniques. |
| Used as enhancer and chaser PA. |
| Frames | Defaults | ||
|---|---|---|---|
| Normal | Charged | Power | PP Cost |
| 40 F | N/A | 661 | 15 |
| Damage Property* | |||||
|---|---|---|---|---|---|
| Actual Power [Behavior + %] |
Damage Per Second [(Actual Power/Frames) x 60] |
Damage Per PP [Actual Power/PP Cost] |
|||
| Normal | Charged | Normal | Charged | Normal | Charged |
| 661 | 992 | 44.1 | |||
Unlike other bow Photon Arts, you cannot attack enemies directly with Chase Arrow. Upon using it, you will stock up to three void arrows, snapshotting the damage bonus from Just Attack, but use your current R-ATK for damage calculation.
Whenever your other bow Photon Arts, including the subsequent Chase Arrow (itself), or charged offensive Techniques hit an enemy, the attack will be fired automatically. Chase Arrow prioritizes the location that your attacks hit, and can be blocked by the parts of the enemy as well. Be wary of your current PP and position if you wish to use the attack to maintain your damage against them.
 |
 |
 |
| Stocking the arrows | Bow PA triggers it. | Charged Tech triggers it. |
|---|
Chase Arrow also locks you in mid-air when you use it, and it does not have damage attenuation or range limitation as long as you can set it. Regardless, Chase Arrow is considered to be an “enhancer” for Bow Braver’s attack rotation, rather than being the attack itself.
How would you use it?
 Focus your mind and fire the ultimate shot, an arrow that pierces everything. |
|
| Used as situational burst PA. |
| Frames | Defaults | ||
|---|---|---|---|
| Normal | Charged | Power | PP Cost |
| 190 F | N/A | 3846 | 30 |
| Damage Property* | |||||
|---|---|---|---|---|---|
| Actual Power [Behavior + %] |
Damage Per Second [(Actual Power/Frames) x 60] |
Damage Per PP [Actual Power/PP Cost] |
|||
| Normal | Charged | Normal | Charged | Normal | Charged |
| 3846 | 1215 | 128.2 | |||
Final Nemesis is the hardest hitting bullet bow Photon Arts if you aim and fire it at the right target. During the 3-second winding up animation, you can adjust your aim to your liking, or else cancel it the moment the light flashes on your bow.
The Photon Arts also lift you up high enough to completely avoid some ground-based attacks,
while also locks you in the air. Be careful as enemy attacks can interrupt you during the preparation.
Note that Final Nemesis has damage attenuation.
How would you use it?
 Use a special arrow to create a gravitational field. Charge to make the gravity stronger. |
|
| Used as crowd control and enemy management PA. |
| Frames | Defaults | ||
|---|---|---|---|
| Normal | Charged | Power | PP Cost |
| 20 F | 36 (29) + 19 F | 877 | 20 (15) |
| Damage Property* | |||||
|---|---|---|---|---|---|
| Actual Power [Behavior + %] |
Damage Per Second [(Actual Power/Frames) x 60] |
Damage Per PP [Actual Power/PP Cost] |
|||
| Normal | Charged | Normal | Charged | Normal | Charged |
| 588 [7% hit; 20% x 3 black hole hits] |
877 [8% hit; 23% x 4 black hole hits] |
1764 | 957 (1096) | 29.4 (39.2) | 43.9 (58.5) |
The Photon Arts is mostly used for grouping up a pack of enemies. While the suction force may not be as strong as Ranger’s Gravity Grenade or Zondeel, it makes up by being spammable. The impact damage of Gravity Points attenuates when firing from long distance. However, the damage from the suction effect is unaffected by the damage attenuation.
How would you use it?
|
Target an area for a rain of arrows. Charge to increase the number of arrows. |
|
| Used as mobbing and enhancer PA. |
| Frames | Defaults | ||
|---|---|---|---|
| Normal | Charged | Power | PP Cost |
| 20 F | 60 (48) + 19 F | 1261 | 20 (15) |
| Damage Property* | |||||
|---|---|---|---|---|---|
| Actual Power [Behavior + %] |
Damage Per Second [(Actual Power/Frames) x 60] |
Damage Per PP [Actual Power/PP Cost] |
|||
| Normal | Charged | Normal | Charged | Normal | Charged |
| 656 [4 hits x 13%] |
1311 [8 hits x 13%] |
1968 | 996 (1174) | 32.8 (43.7) | 65.6 (87.4) |
There are many things that you should know about it. Uncharged Torrential Arrow deals four hits of damage and
stays for one second, while the charged version deals eight hits and stays over three seconds instead.
The distance between you and your target also determines the time it takes for the Photon Arts to land,
starting from one second at close range up to 2.2 seconds at maximum range and beyond.
While it may sound weird, the hit judgement seems to evaluate from top to bottom and has a larger area of effect than its visual. You can aim Torrential Arrow yourself with the targeting outline or the lock-on mode. Note that the Photon Arts does not have damage attenuation.
How would you use it?
|
Deliver a series of kicks on the spot then fires several arrows. Charge for more attacks. You are able to move. |
|
| Used as situational, sustained damage PA. |
| Frames | Defaults | ||
|---|---|---|---|
| Normal | Charged | Power | PP Cost |
| 66 F | 60 (48) + 180 F | At most 4914 | At least 30 (25) |
| Damage Property* | |||||
|---|---|---|---|---|---|
| Actual Power [Behavior + %] |
Damage Per Second [(Actual Power/Frames) x 60] |
Damage Per PP [Actual Power/PP Cost] |
|||
| Normal | Charged | Normal | Charged | Normal | Charged |
| 1818 [37%] | 4963 [101%] | 1732 | 1241 (1306) | 49.9 (59.1) | 136.1 (161.3) |
This is a “crafted version” of the regular Trit Shooter, granting extra attacks with even more damage. You can control the direction of Trit Shooter Type-Zero with directional input, moving your character forward while doing so except when used in the air.
Despite incorporating melee attacks, the Photon Arts scales the damage purely from your current R-ATK. The arrows fired from the attack are similar to Master Shot but without its homing property. And yes, the arrows have damage attenuation, but the usage range of it means you can safely ignore the damage penalty.
Note that you can cancel the attack animation after every bow shot.
How would you use it?
|
Fire countless arrows that pierce the enemy. Continues as long as the button is held. |
|
| Used as situational damaging and mobbing PA. |
| Frames | Power | PP Cost |
|---|---|---|
|
24 F to enter firing pose. 27 F to exit firing pose.
Deals damage every 14 F |
2326 | Starts from 25 |
| Damage Property* | |||||
|---|---|---|---|---|---|
| Actual Power [Behavior + %] |
Damage Per Second [(Actual Power/Frames) x 60] |
Damage Per PP [Actual Power/PP Cost] |
|||
| 2326 (Cannot be charged. Each hit is 10%.) |
2s Hold (36 PP): 700 10s Hold (100 PP): 919 20s Hold (180 PP): 956 |
2s Hold: 64.6 10s Hold: 116.3 20s Hold (180 PP): 129.2 |
|||
Also, DPS and calculation of the PA differ from the rest. The number of “996.8” is “Upfront Damage” using the common formula. The 20 seconds of 956, however, use an alternate formula, alongside a slight frame variance possibly from unexpected technical errors.
|
Common DPS Calculation (Actual Power / Frames Hit) x 60 |
Channeling Attack DPS Calculation [{(Time as Frames - Prep. Animation Frames) / Frames Hit} x Actual Power]/ Time as Seconds |
Million Storm doesn’t fire countless arrows toward the enemies, but rather, dealing damage to any enemies in a set interval as long as they stay in the visual cylinder. There is a preparing animation for the attack, and it roots your in place as long as you hold it. Exiting animation also exists, and you can always use Step to cancel the animation of Million Storm.
Note that the Photon Art also has damage attenuation at its maximum range.
How would you use it?
|
Use yourself as the arrow in a truly desperate attack. Charge to increase damage. |

|
| Used as situational damaging or traversal PA. |
| Frames | Defaults | ||
|---|---|---|---|
| Normal | Charged | Power | PP Cost |
| 92 / 63 F | 100 (80) + 60 / 32 F | 1493 | 30 (25) |
| Damage Property* | |||||
|---|---|---|---|---|---|
| Actual Power [Behavior + %] |
Damage Per Second [(Actual Power/Frames) x 60] |
Damage Per PP [Actual Power/PP Cost] |
|||
| Normal | Charged | Normal | Charged | Normal | Charged |
| 985 [40% Rush + 26% Kick] |
2239 [90% Rush + 60% Kick] |
642 / 938 | 839 / 1017 (959 / 1199) |
32.8 (39.4) | 74.6 (89.5) |
As desperate as it sounds, you are vulnerable to everything while dashing forward to the targeted enemy, even stopping at any obstacles if hit. Otherwise, Kamikaze Arrow will always launch you horizontally based on your movement input. It also has two-part attacks: the diving scales the damage with your current R-ATK, and the somersault kick scales with your current S-ATK instead.
Kamikaze Arrow does not have damage attenuation, but it does have limited travel range. Also, if the rush part of the PA hits lesser enemy, your character will stick to and hard stagger it for a brief moment BEFORE somersaulting back.
Larger enemies such as bosses will cause your character to somersault immediately after hitting it instead.
How would you use it?
“How far can Bullet Bow attacks and PA can go in PSO2?”. Well, the Internet can’t really answer you that so I’ve decided to do some questionable testing procedure and use my personal experiences to tell you about it. Here’s the Bullet Bow Photon Arts attack range.
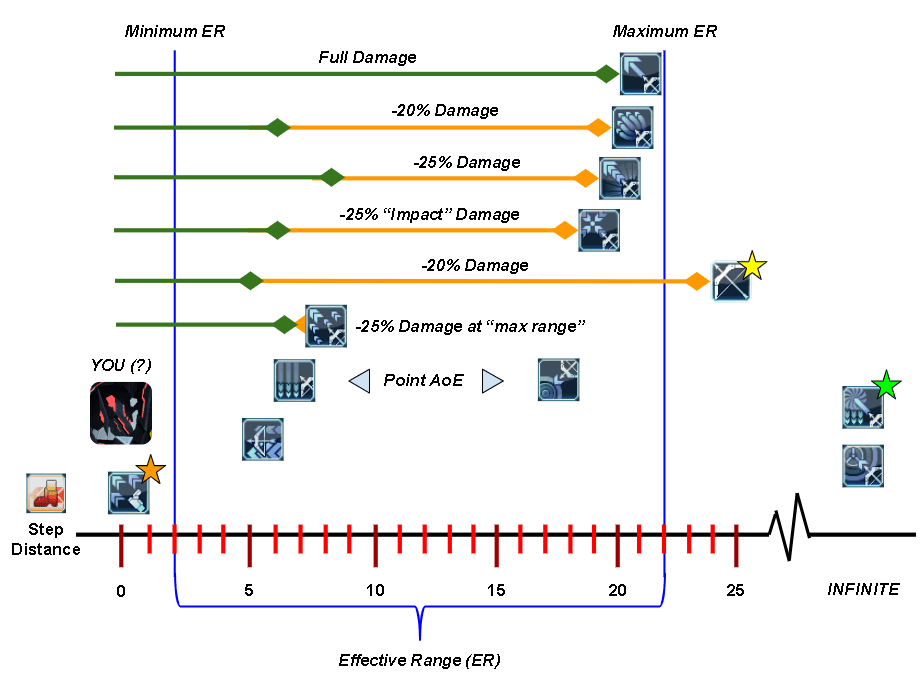
Estimated Bow Attack Range Chart, Aug. 2019, experimented by Argus.
It is a visualization of how far you can attack things with the bullet bow.
You do not need to measure the exact distance before firing! (1 Step = ~3.5 meters.)
In real fights, you won’t be “stepping” and make a perfect distance judgment. When you see your damage drops, say using Master Shot, it’s either you are too far away or you miss your JA. When you're ~8-9 Steps away from an enemy, you can’t lock on to it.
As you can see from the above, several Bullet Bow attacks can hit things reliably up to ~18 Steps away from your current position. However, most encounters will have you fighting less than that distance. Adding to that, Bullet Bow effective range usually starts from at least 2 Steps distance away from any enemy.
Keeping yourself within 5 steps away from your enemy guarantees that most PA will deal full damage unless it decides to move off-map. Below is a reference using Codotta Idetta and its arena in Trace of Darkness.
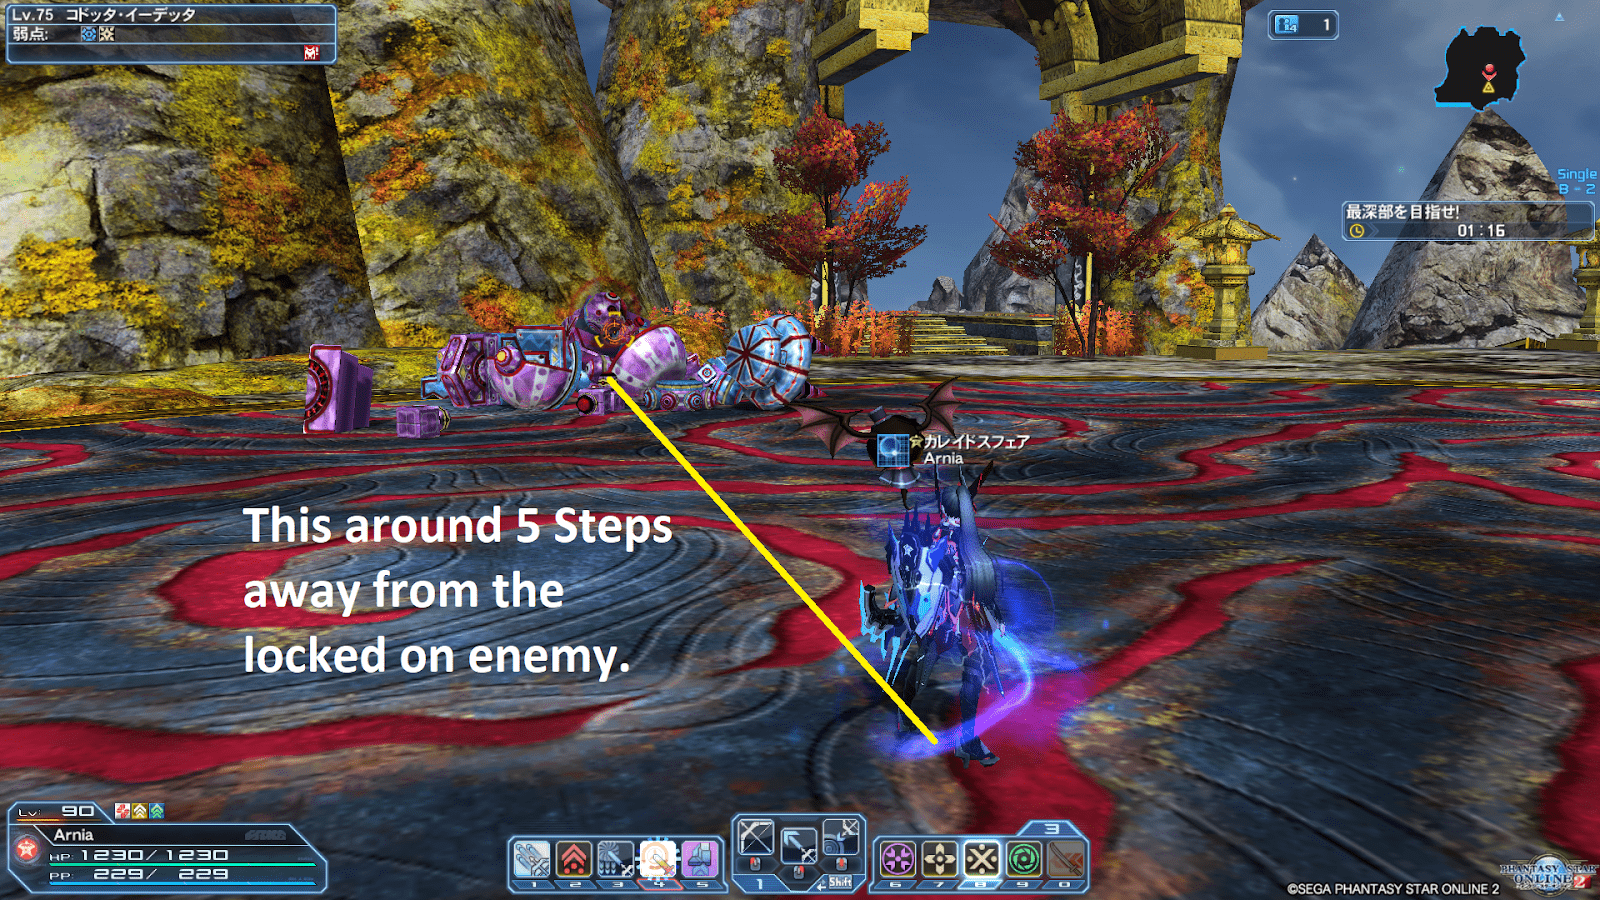
The enemy is “not too big and not too small on your screen”.
For the other weird cases...
|
Cerulean Ballista |
Root yourself in place and fire powerful projectiles toward the enemies, blasting them with unparalleled photonic force. Movement input on activation can switch the mode between Focus and Scatter. |
| Situational Nuke | Power Value: 48681 | Consume 1 Stock | |
Bow Braver has access to one of the most devastating attacks in PSO2. Before diving deeper, here is the summarized information about the attack that you should know. And really, EN server, you gonna name it [Build Up PA]?
 “Stock”
instead. You accumulate it while attacking, up to 3 by default. Completing additional quests from Koffie will increase it to a maximum of 6.
“Stock”
instead. You accumulate it while attacking, up to 3 by default. Completing additional quests from Koffie will increase it to a maximum of 6. |
 |
Cerulean Ballista will use this mode if there is no movement input upon activation. Sending the lightning bolt projectile, it explodes on the target with 20% of the CPA power value for 5 hits (100%, 48681). Note that it can hit multiple enemies that are tightly packed together, and your aiming mode can affect the targeting of this mode. Also, you will lose the attacks if you switch another weapon or die before the projectile hits something.
It takes 142 Frames to execute, while the arrow bolt has ~80 Frames delay before landing on a target. The maximum range of Focus mode is ~42 meters, and firing it without anything in your sight will either drop the CPA in front of you
or the location of your crosshair within its maximum range.Focus mode hits close to the explosion damage of most Barrage Banisher Combos (The Long Ones).
 |
 |
Cerulean Ballista will use this mode if there is a movement input upon activation. The attack now fires a barrage of projectiles in cone (despite it’s strafing visual), dealing damage to all targets in the area for 66% of the CPA power value (32129). It’s worth mentioning that Scatter mode, while having a limited vertical range, can often hit everything that appears on your screen. Enemies orientation can affect the targeting of this mode as well.
It takes only 138 Frames to execute with a maximum range of ~28 meters.
Other properties that are shared between the modes are:
Think of the CPA as of the “Final Nemesis 2.0(TM)” that activates faster, more versatile, and can clear most minor enemies in one input. The slight delay after firing it and the learning process can be somewhat annoying, but you will get comfortable with it eventually. Therefore, keep calm, aim with care, and get creative with it.
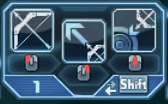
This is my personal playstyle, and you can adjust it to however you like. Back in the part about the preparation before playing Bullet Bow Braver, I did say something about “Button Layout”. Shoutout to that guy who made it.
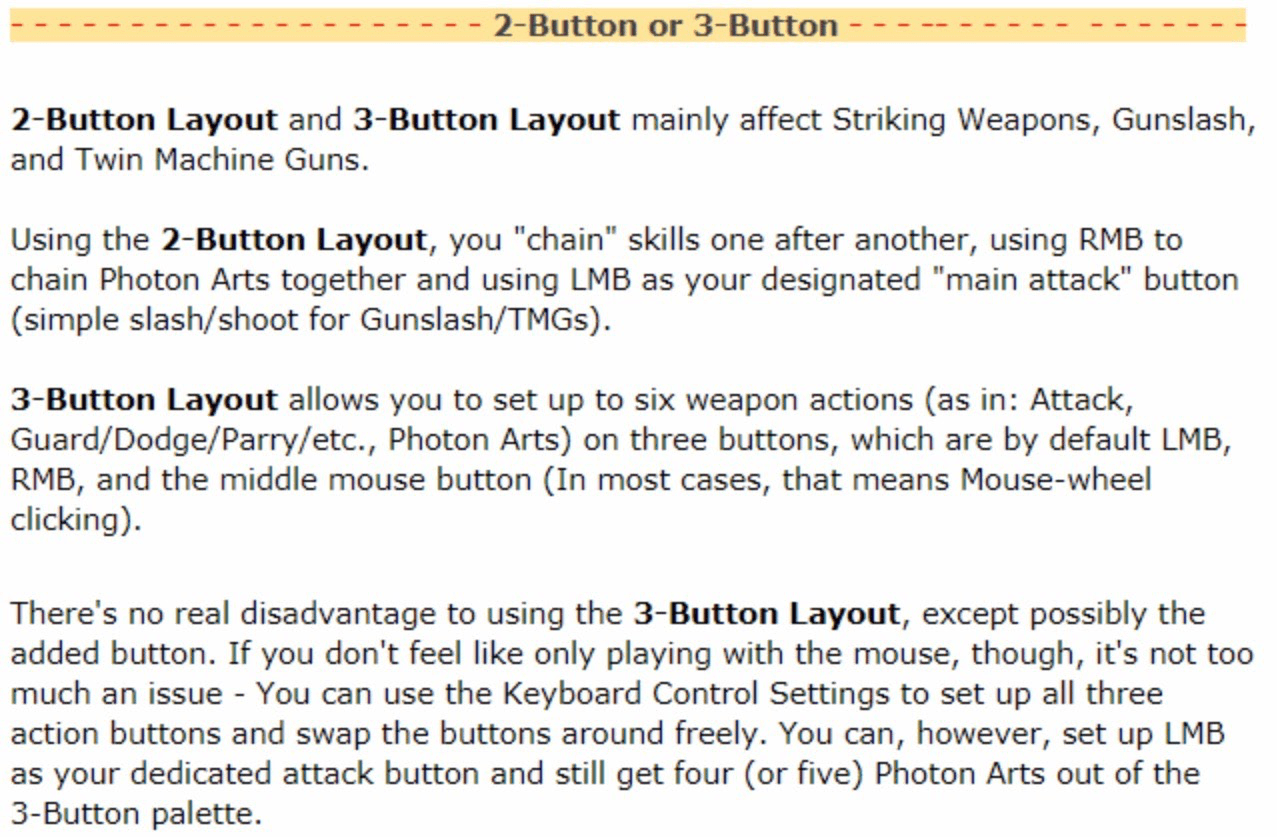
With 3-Button Layout, you now have 6 slots to put your attacks in. One of them is always
 Bullet Bow Normal Attack, and you are free to set your PA to whatever binding that you prefer.
Just make sure that you have the following PAs in your main weapon palette, so you can handle most contents.
Bullet Bow Normal Attack, and you are free to set your PA to whatever binding that you prefer.
Just make sure that you have the following PAs in your main weapon palette, so you can handle most contents.
| Must-have against everything | Situational usage or sub-palette | Unnecessary or can be a niche |
|---|---|---|
| Penetrate Arrow, Sharp Bomb T0, Banishing Arrow, Master Shot | Final Nemesis, Chase Arrow, Torrential Arrow, Gravity Point | Trit Shooter T0, Kamikaze Arrow, Million Storm |

Speaking of the sub-palette, it depends on which subclass you use. You can adjust it however you like to fit your playstyle and preference. The general rule is as followed:
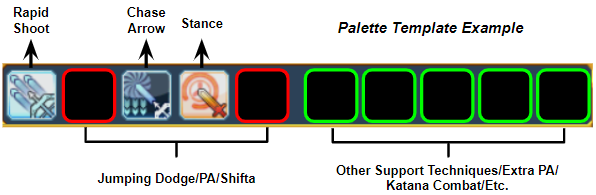
A loosely created rule/template.
Playing BrPh or BrSu means that you have access to Techniques, and lots of them are good. Some are already mentioned, but having an entry for it is better. As I do not primarily play Force or Techer, I will explain them based on my experience, observation, and pulling things from the wiki/visiphone.
All of them are chargeable, field-based Techniques. Casting any of them will remove the existing field except for Zondeel. Most of the time, you would tap them once instead of charging.
 Shifta
 Deband
 Zondeel
 Resta
Resta
 Anti
Anti
 Zanverse
 Megiverse
 There are two options here. While chaining Step Kick with bow or dashing around with Asagiri-rendan with katana are better, you may need other movement options in some fights.
 Safoie Type-0 (Zero Safoie)
 Ilzonde
 Nabarta Type-0 (Zero Nabarta)
 Grants and
 Ilbarta are the preferred options.
Although the guide used to mention inflicting status effects through the use of techniques, it’s not really our job to do such a thing when you can use weapons to do so instead. Regardless, it’s ok to know about them, and you can always check Cathy’s Handy Status Effect Spreadsheet to see how each major enemy reacts to them. My suggestion? A local Force user who is my acquaintance once recommended the followings if things go south:
|
Use  Nafoie. Nafoie.
|
Use  Rabarta. Rabarta.
|
Use the  Nazonde-
Zondeel combo. Nazonde-
Zondeel combo.
|
|
Use Zanverse w/ rapid-hit attacks.
|
Use  Nagrant. Nagrant.
|
Use  Gimegid or Gimegid or
 Ramegid T0 Ramegid T0
|
Powered by w3.css and the cursed soul of the guide writer UwU.
 Asagiri-rendan